
This fall a recent death in the family left a bit of a gap in our life. My wife started searching for a way for our family to better keep in contact with each other. After some searching, she came across these long distance touch lamps. Intrigued by the concept, I searched to see if I could build a similar product at a more appealing price point.
After some searching, I discovered the kickstarter project of the same lamps found on Uncommon Goods and the creator’s step-by-step how-to on Instructables explaining how he made the Filimin touch lamp. What follows is my own how-to on how I created wifi enabled touch lamps to connect my wife, her mom, grandma, and aunt.
The wifi lamps change color when touched and synchronize their colors to be the same no matter where in the world they are located. Each lamp gets assigned a default color so you know who has touched their lamp. This implementation is adapted and heavily borrowed from John Harrison’s original touch lights.
Materials, Supplies, And Tools
Below are the materials, supplies, and tools I used to make my touch lamps.
Materials
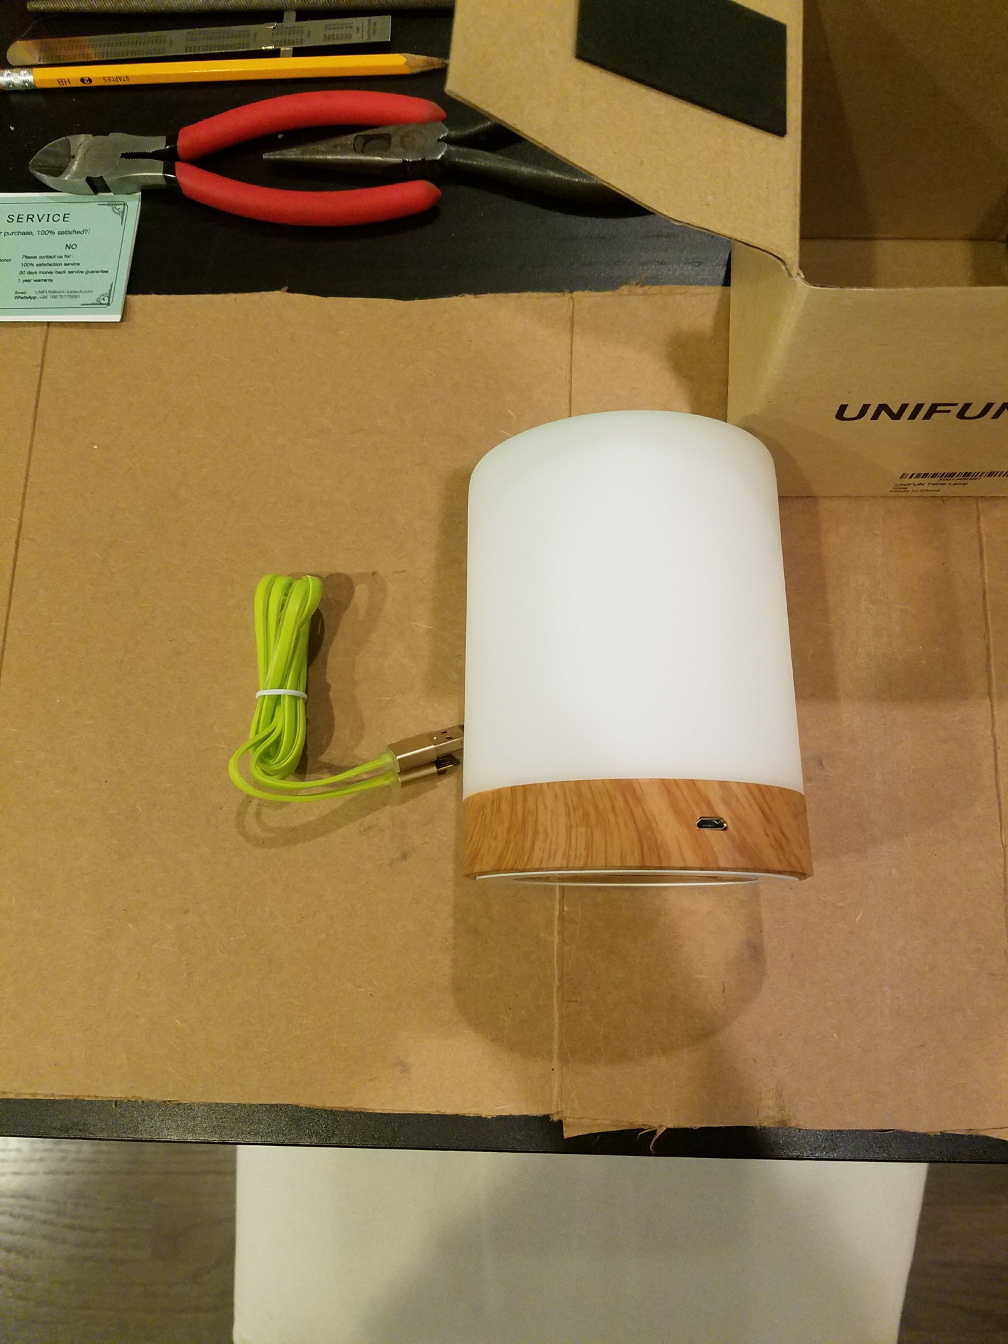
- Unifun Touch Lamp ($18)
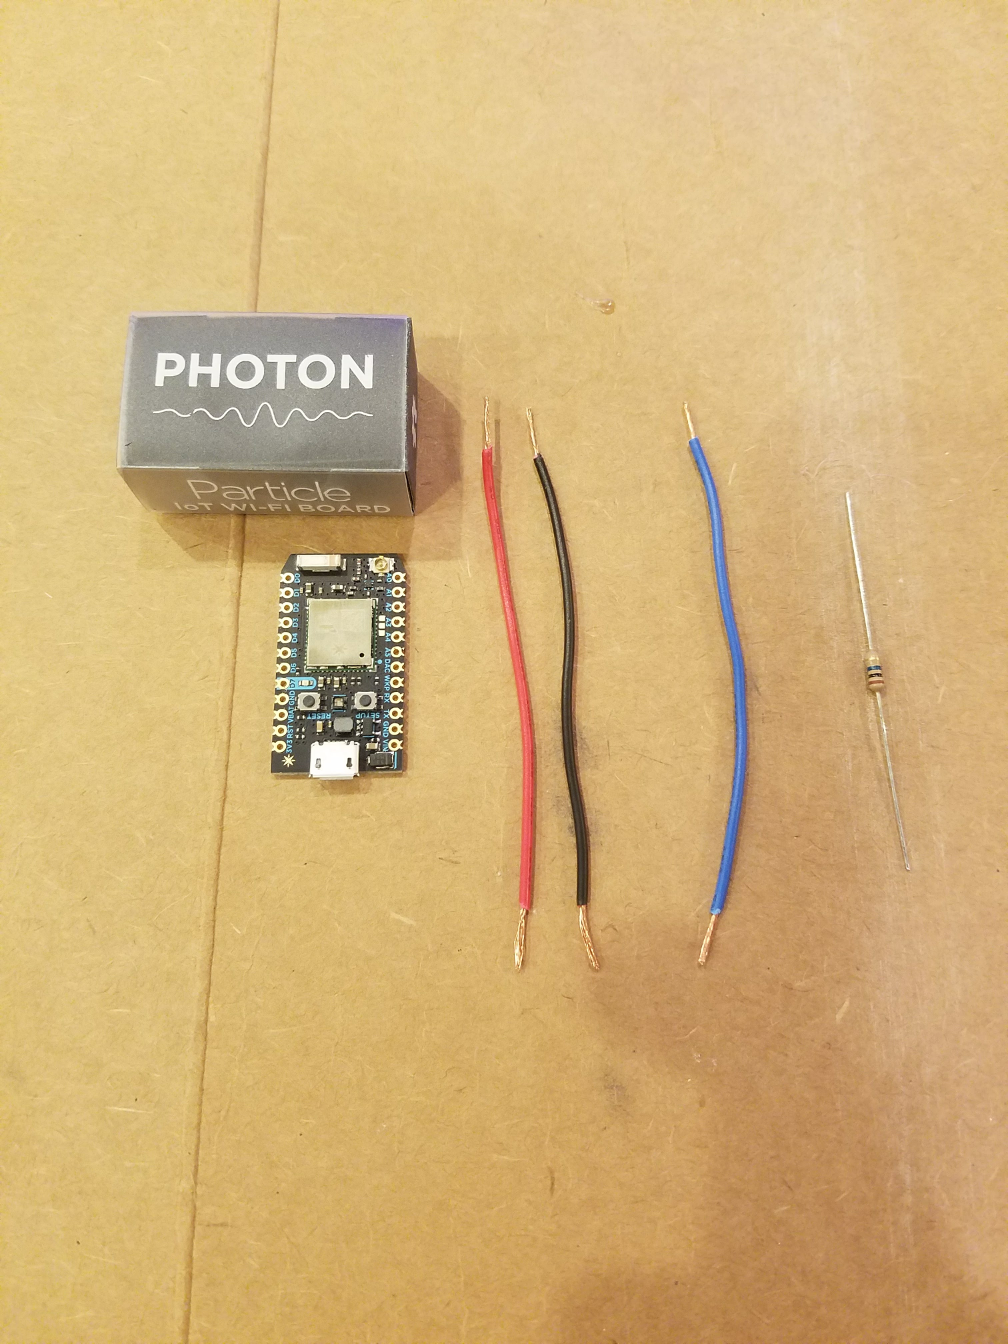
- Particle Photon without headers ($19)
- NeoPixel Ring 24 ($17)
- 10M-Ohm Resistor ($1)
- 3/8” felt pads for covering screw holes on the bottom of the lamp
- A USB phone charger, should be name brand such as Apple, Samsung, Motorola, etc.
- A wooden dowel (1-1/2” inch) for bracing the Photon when plugging in the USB cable
Supplies
- Wire (gauge 22AWG)
- Solder
- Hot Glue
- Goo Gone to remove sticky adhesive from the bottom of the lamp
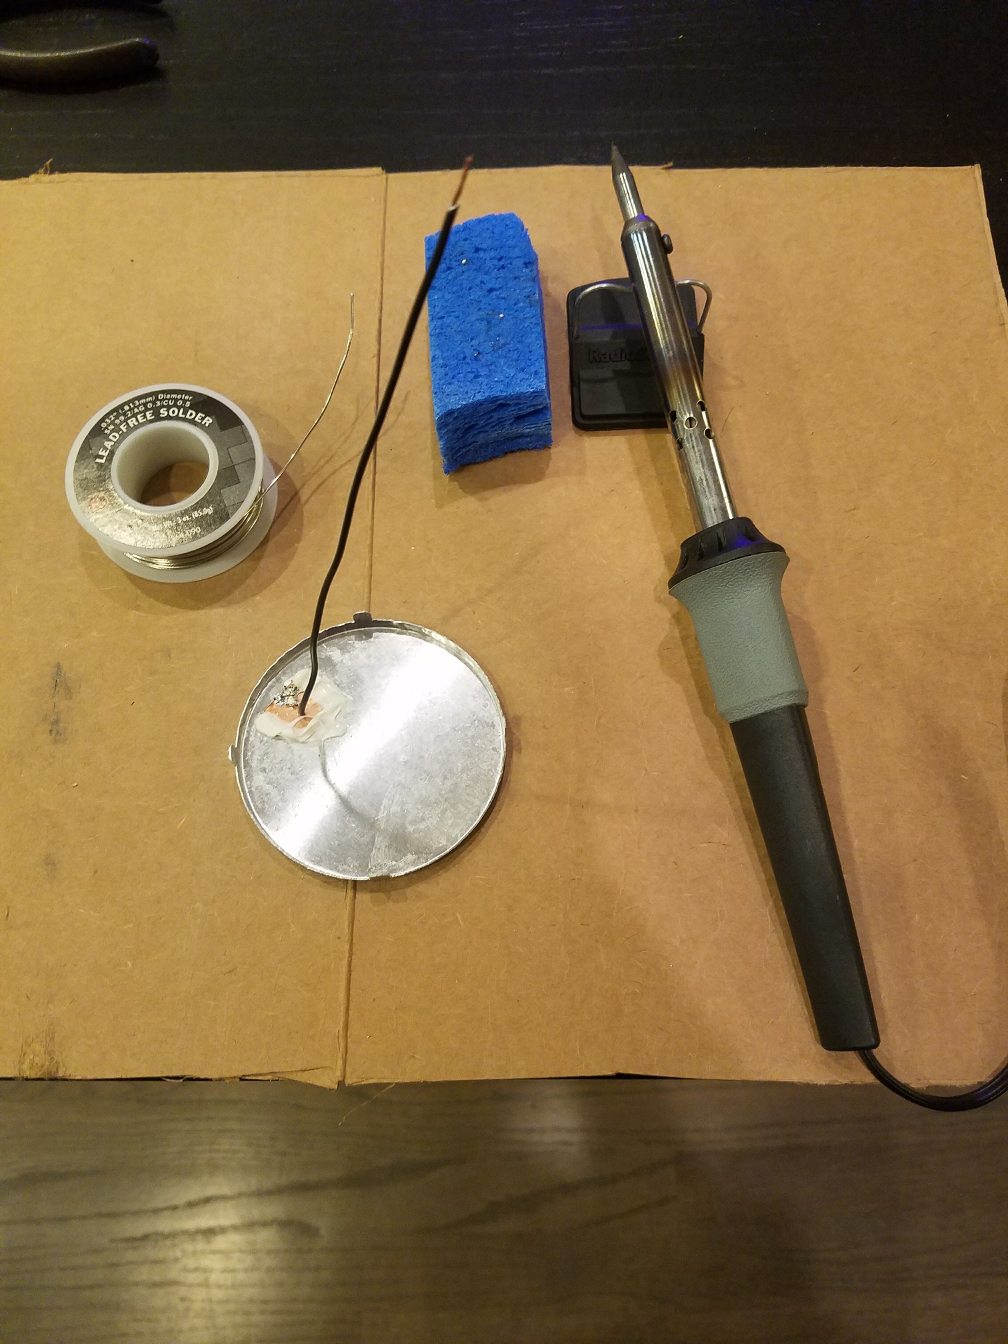
Tools
- Screwdriver
- Razorblade
- Soldering iron
- Hot glue gun
- Drill and 3/32” drill bit
- Wirecutter/wire stripper
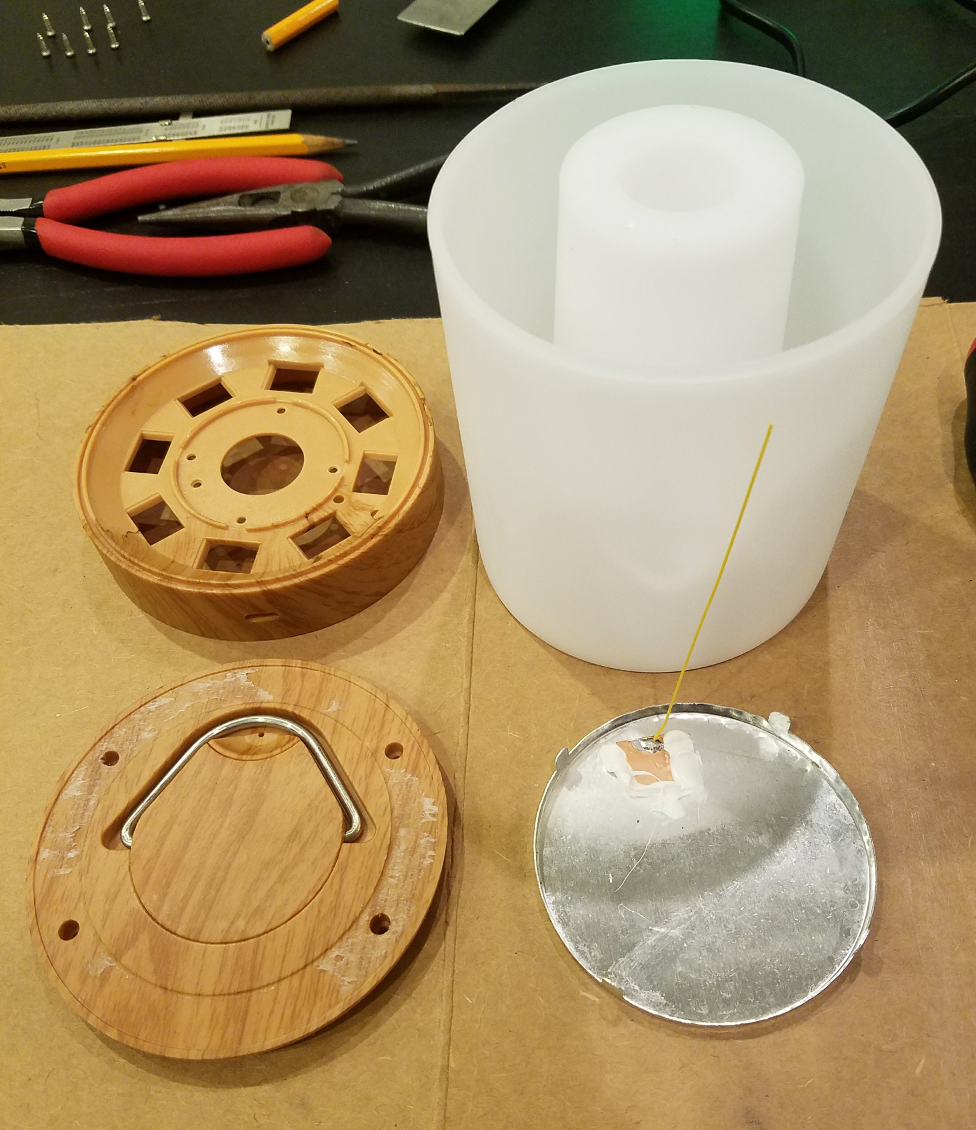
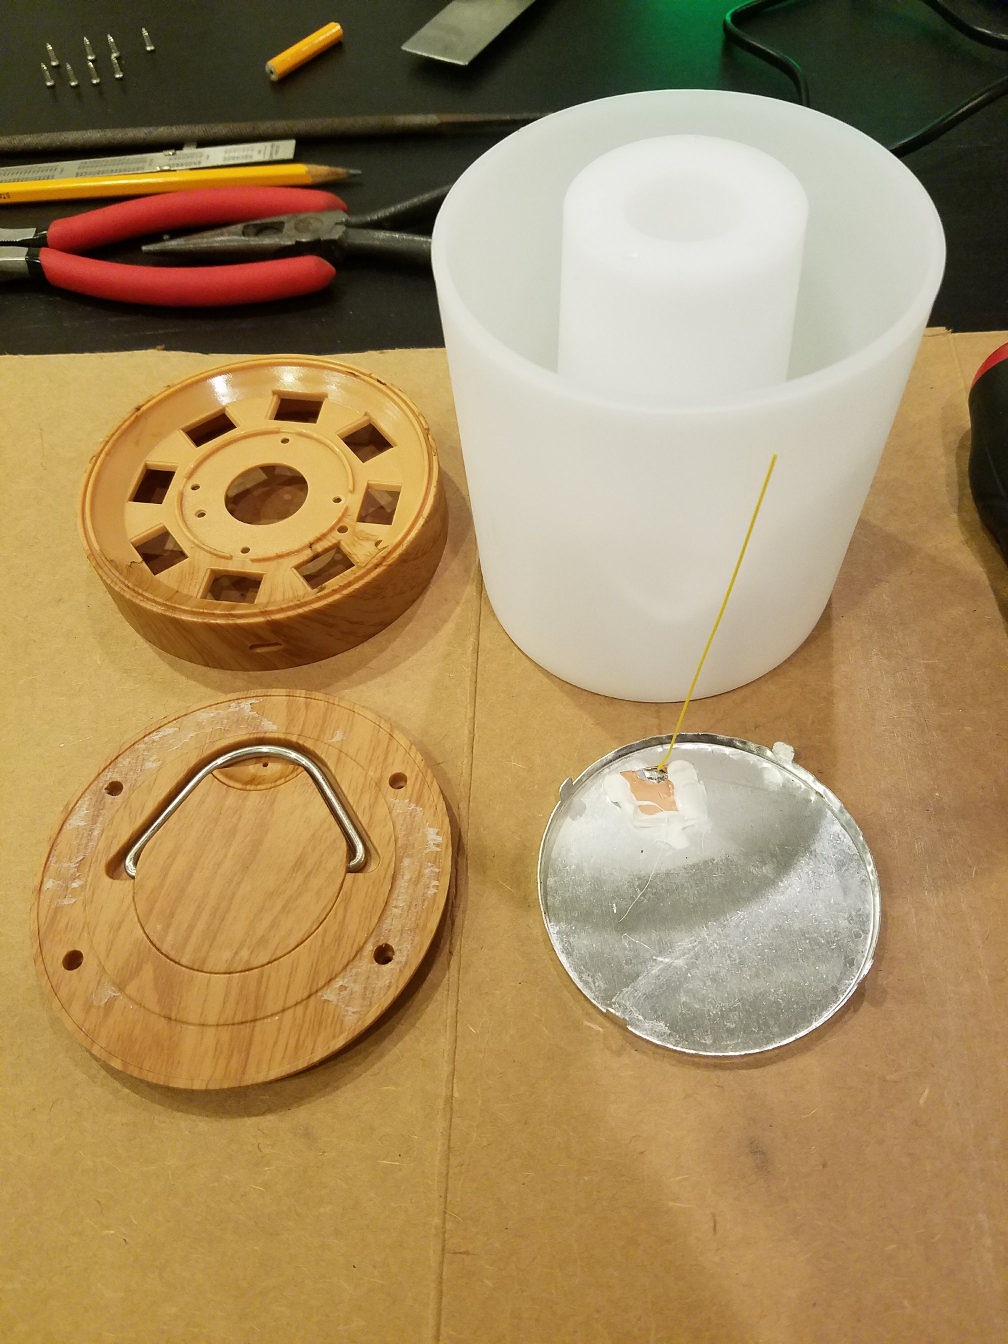
Step 1: Disassemble the Unifun Touch Lamp
The first step is to disassemble your Unifun Touch Lamp. The finished product should look like the following.
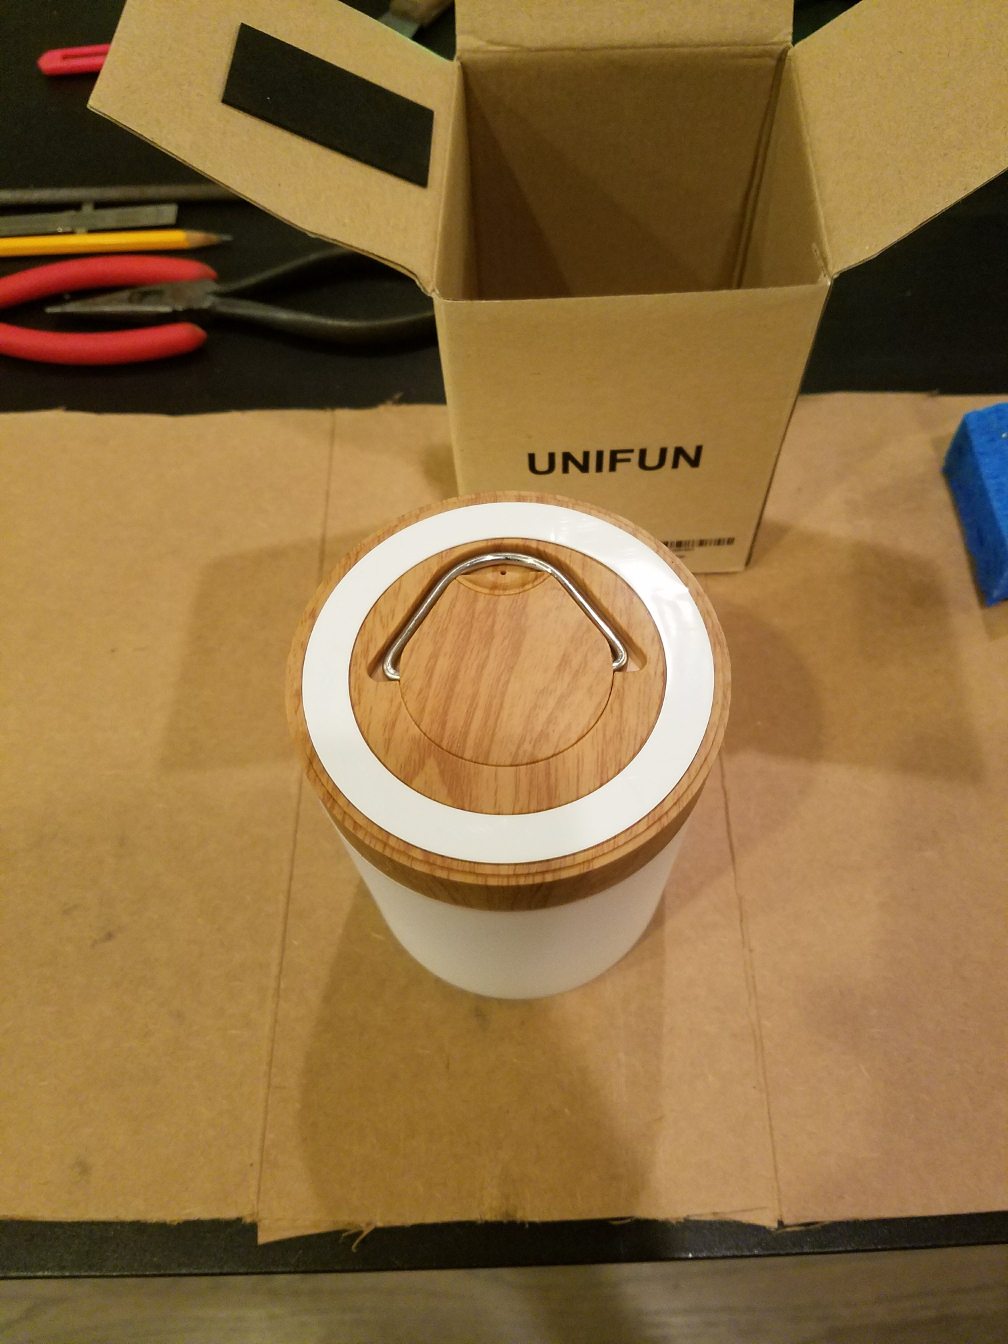
- Remove the foam ring from the bottom of the touch lamp. Be careful to remove as much of the stickiness as possible from the bottom of the lamp.
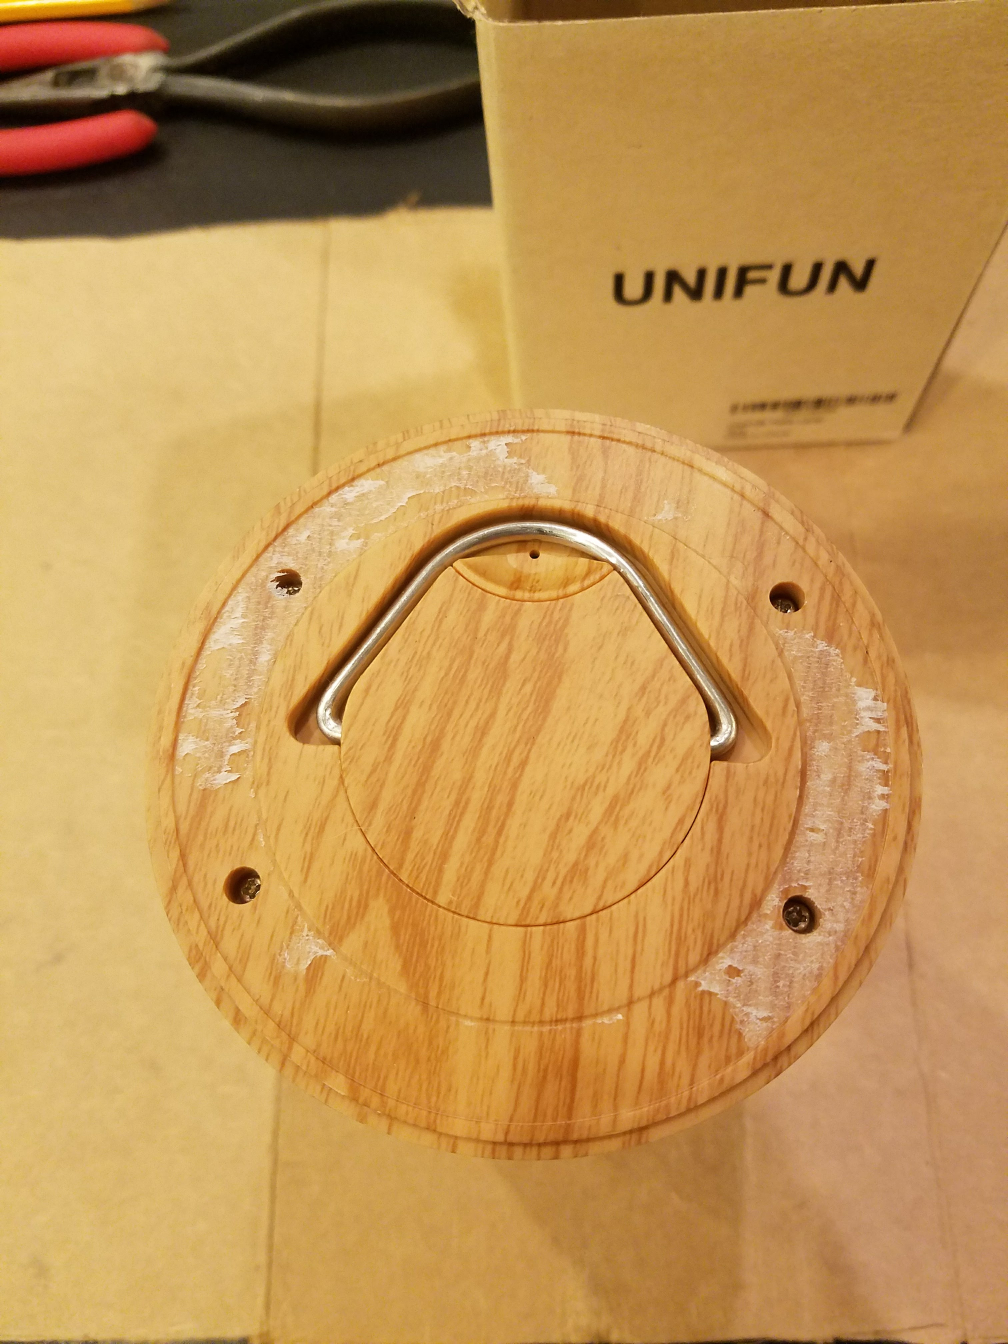
- Unscrew the screws from the bottom of the lamp and remove the bottom plate.
- Remove the four silver screws to loosen the top white dome from the base of the lamp. Do not remove the dome yet.

- Peer between the white dome and the base for a thin wire connecting the top touch plate to the circuitboard. Cut this wire with a razorblade or wire cutter.
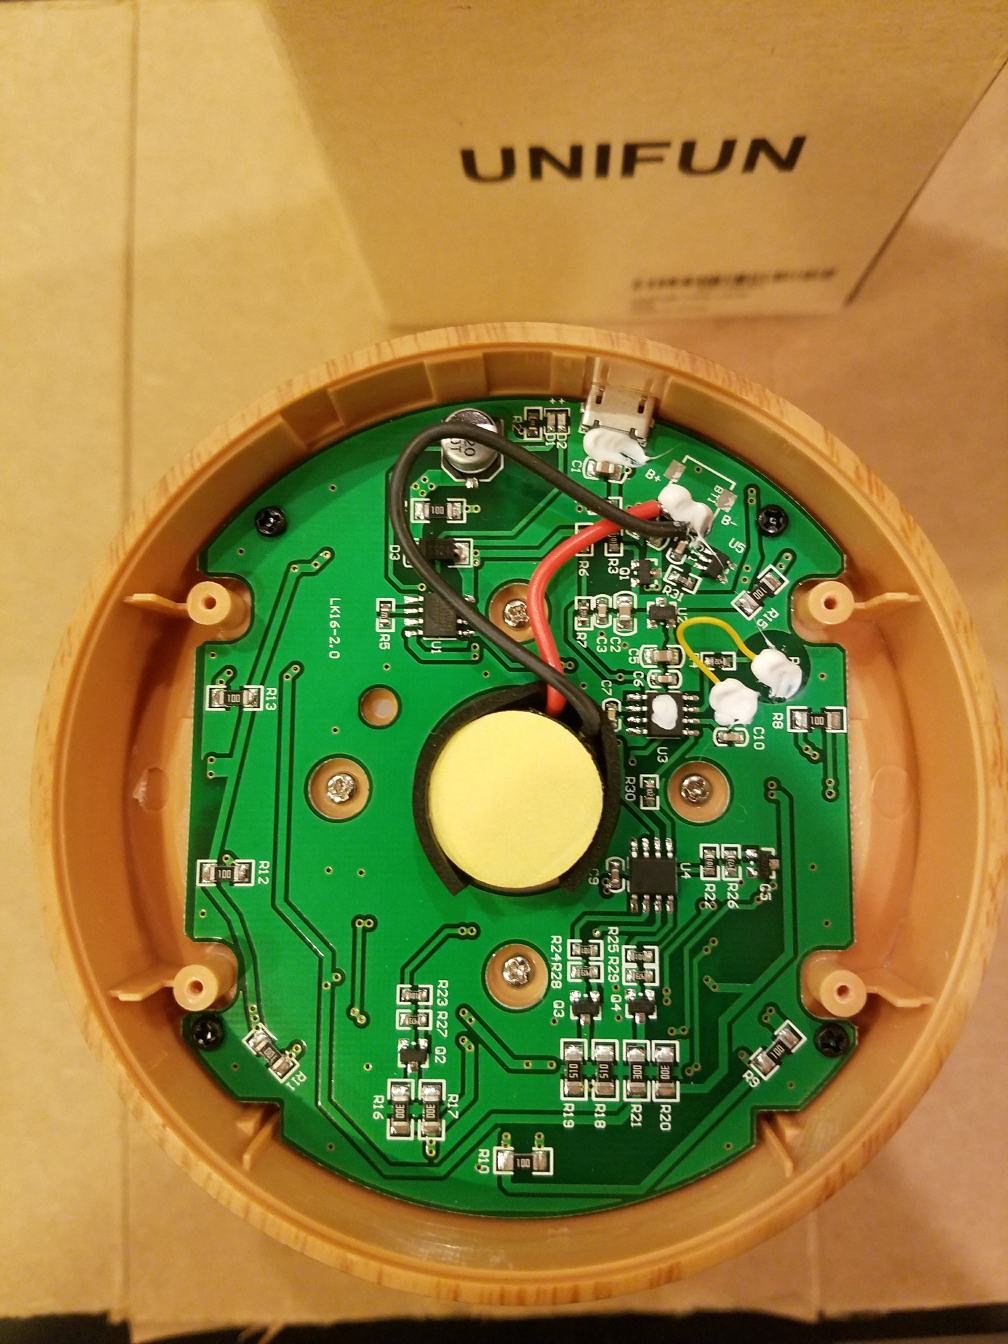
- Unscrew and remove the circuit board from the lamp base.
- Use a screwdriver to push the flaps holding the touch plate to the white dome.
- Use a soldering iron to remove the wire connected to the touch plate.
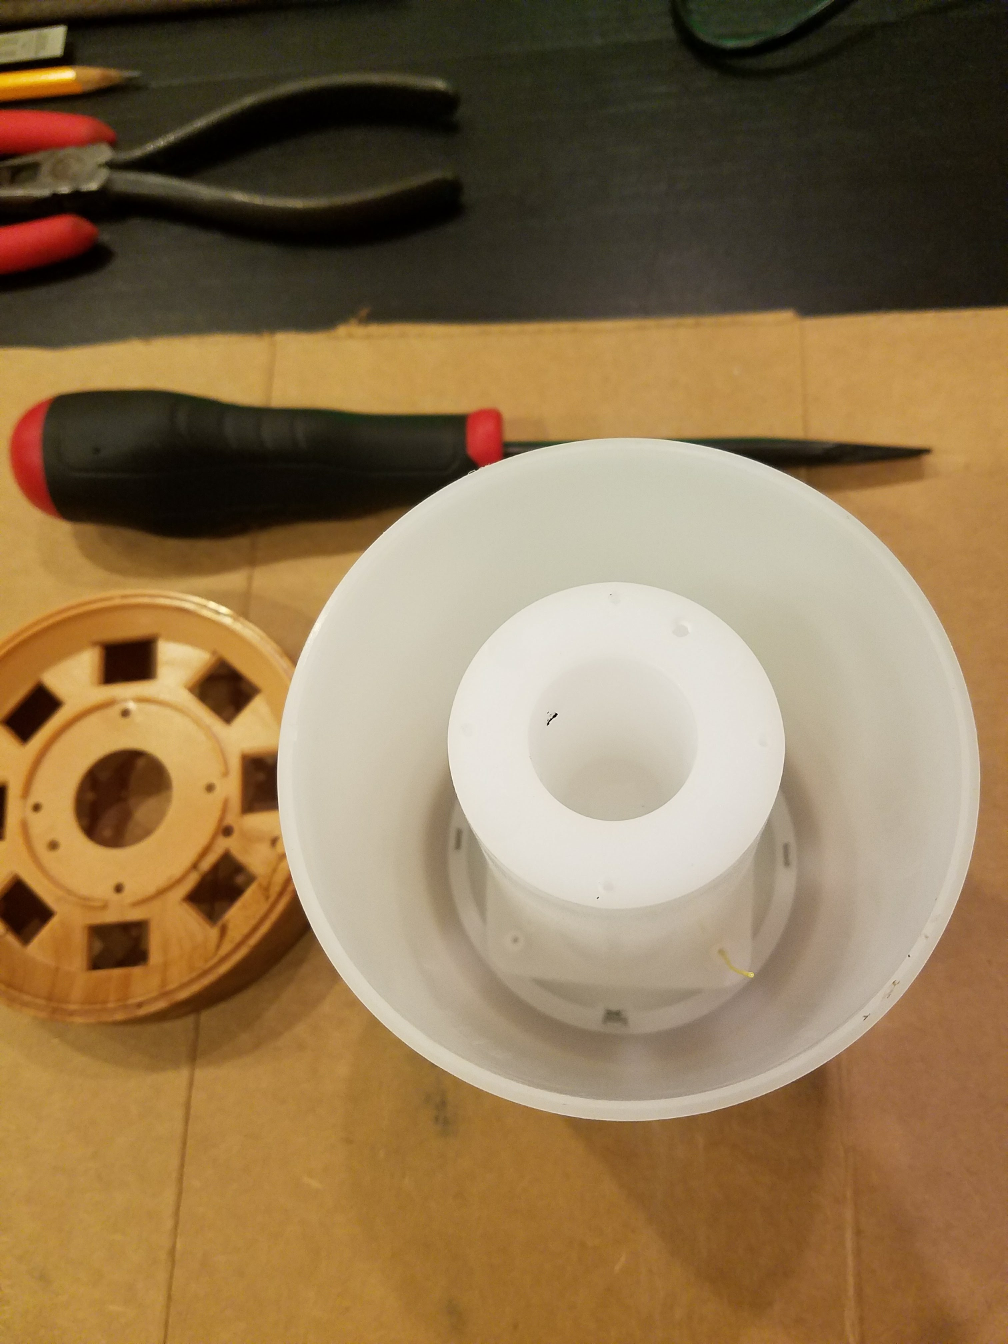
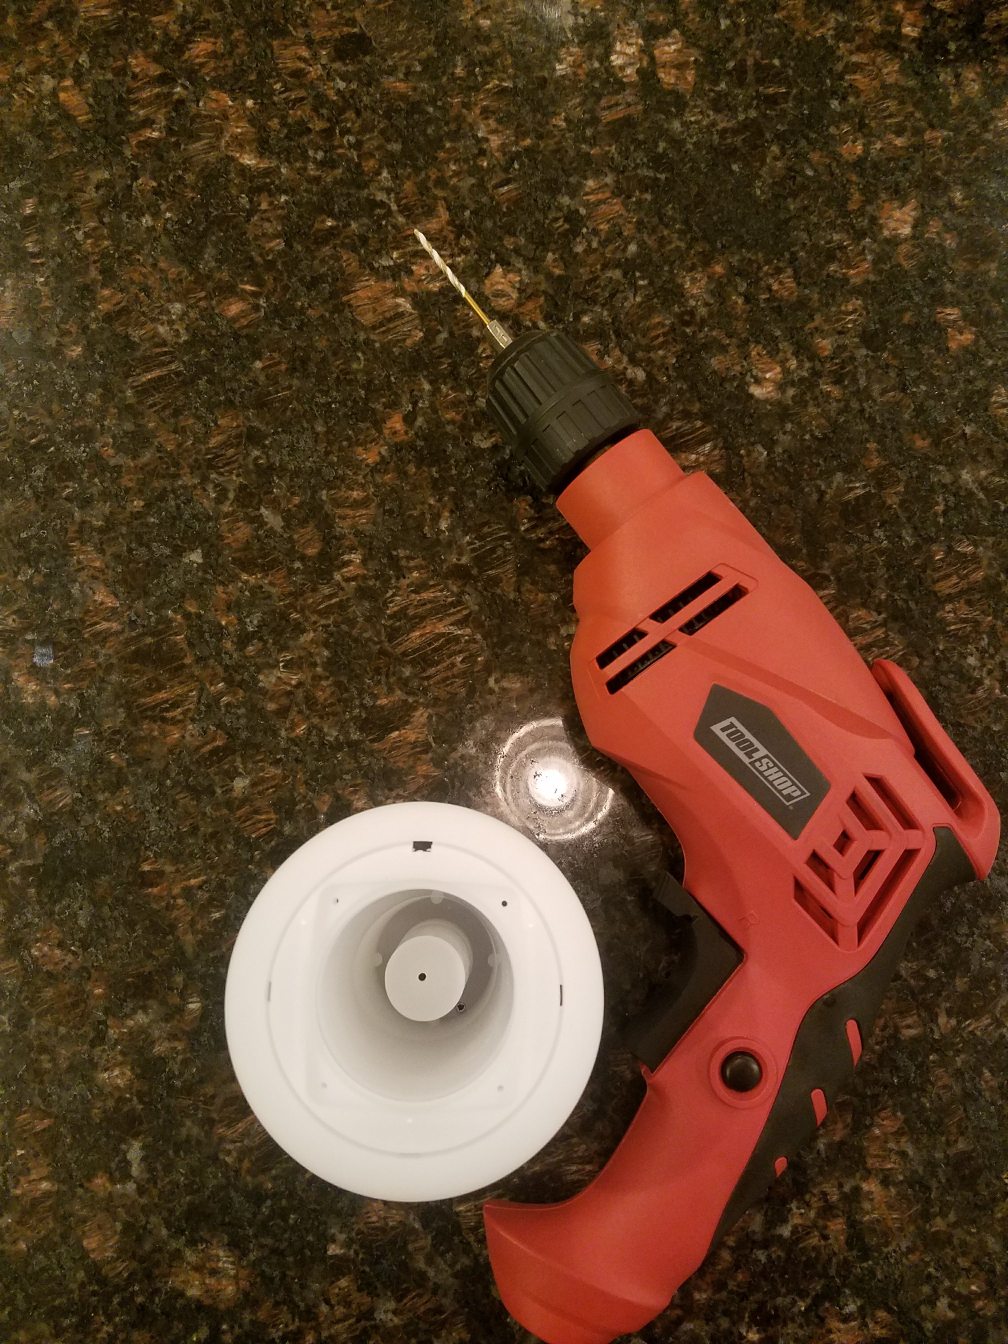
Step 2: Prepare the Shell
Once you have your lamp disassembled, you need to prepare it to be reassembled with your wifi-enabled components.
- Use Goo Gone or some other solvent to remove the sticky residue off of the bottom plate of the lamp.
- Use a 3/32” drill bit to drill a hole through the center of the battery compartment of the white dome.
- Cut a 6-3/4” piece of wire and solder it to the touch plate.
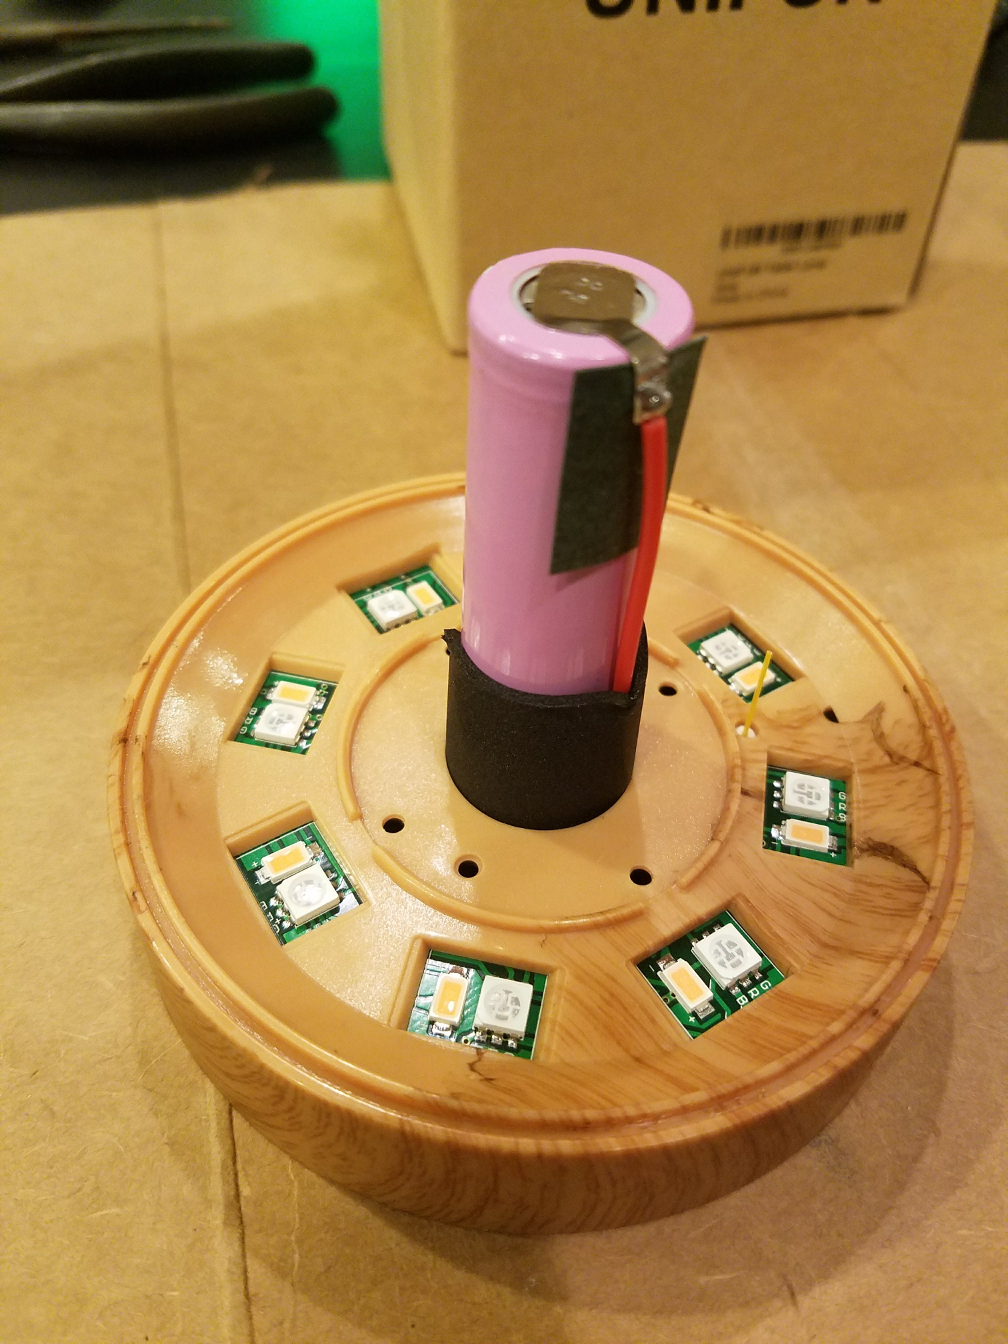
Step 3: Connect the Electrical Components
Now it’s time to connect the electrical components together.
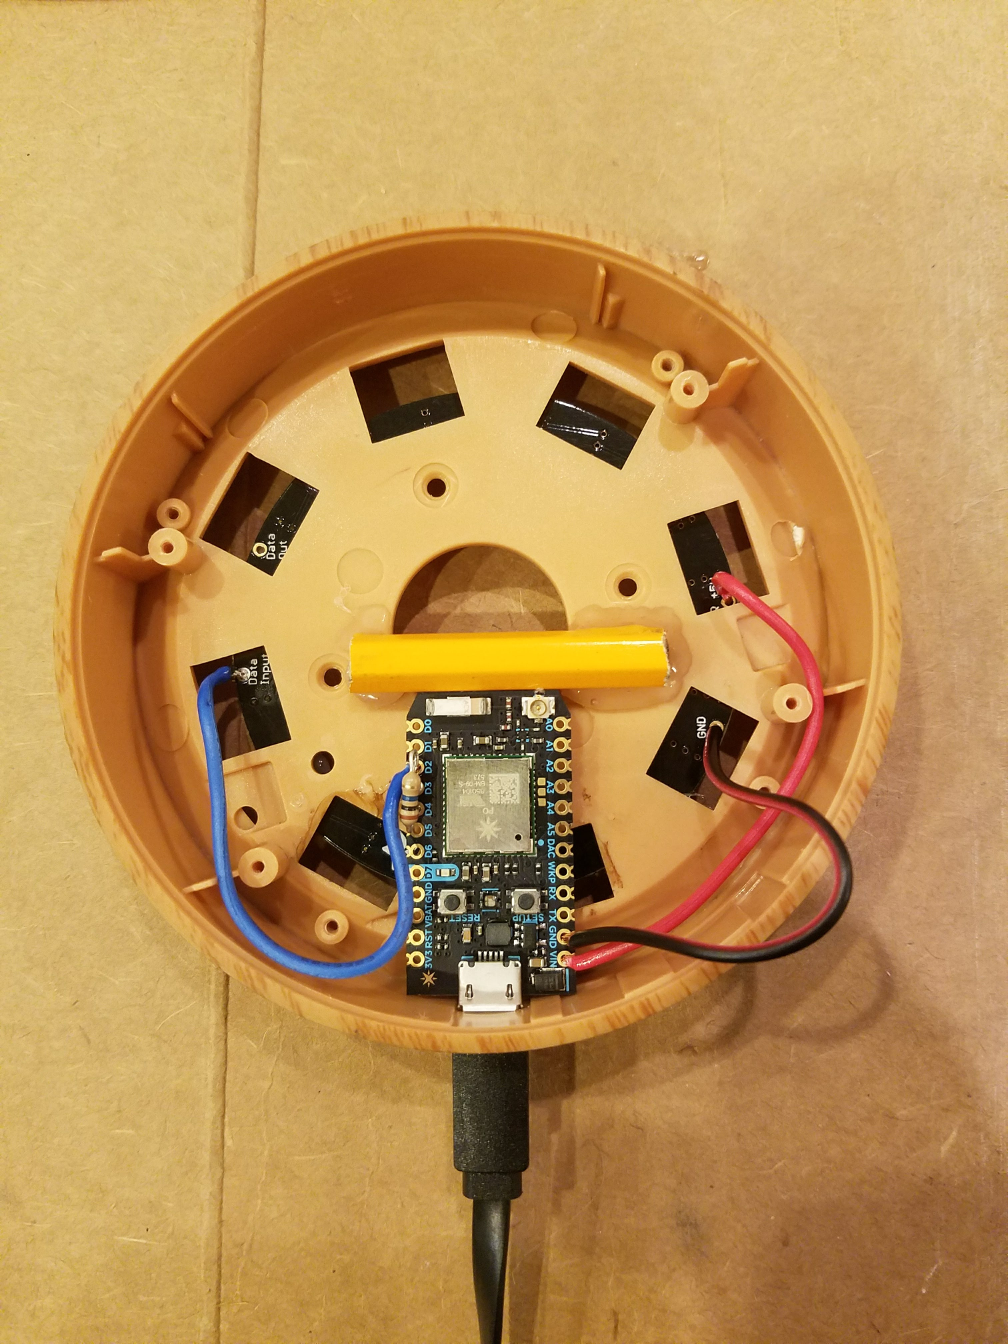
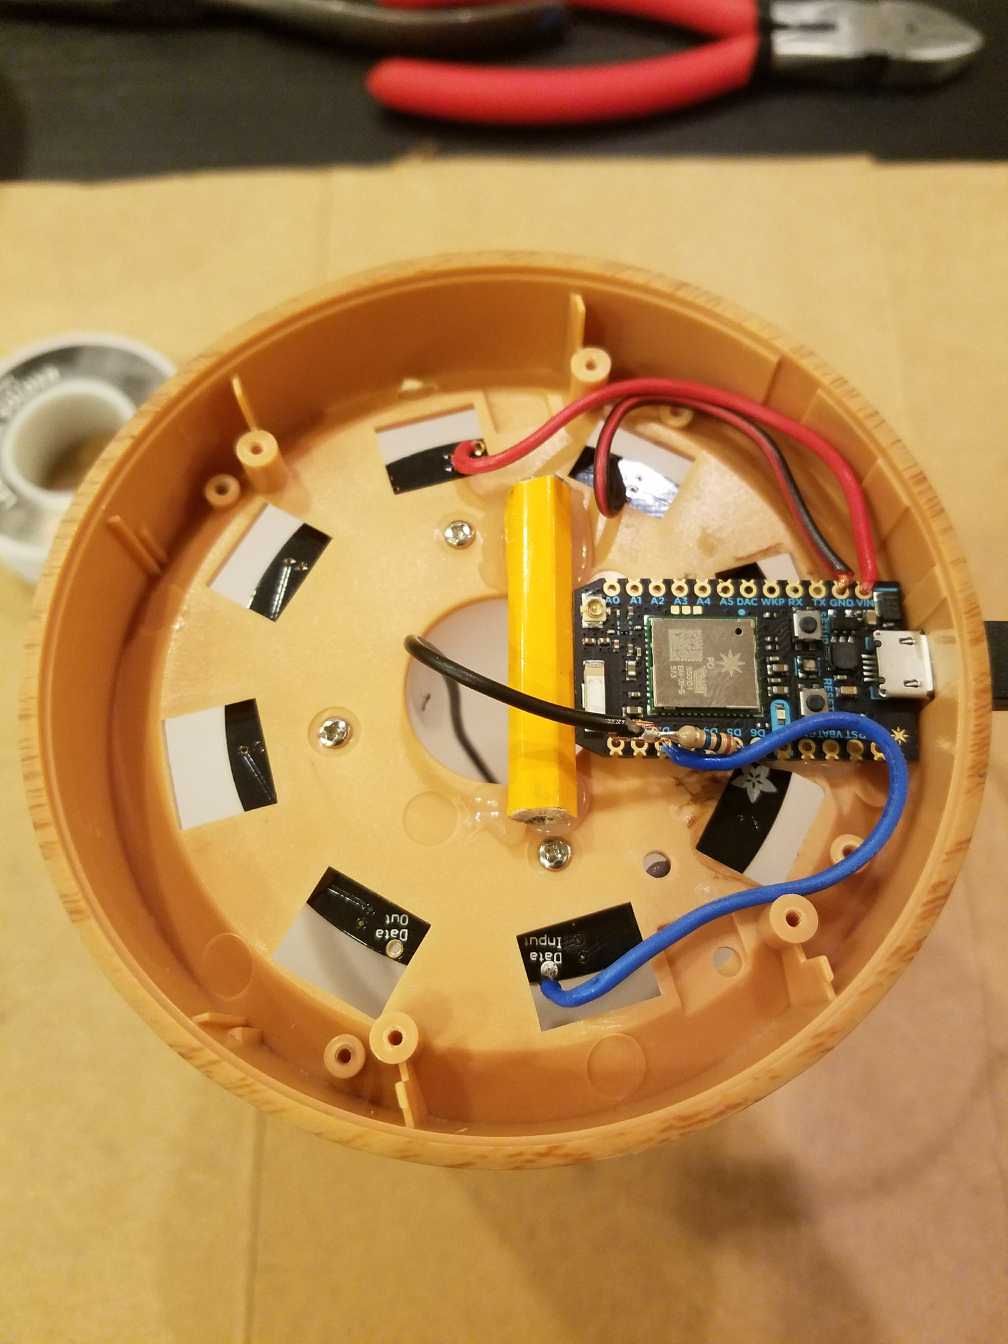
- Solder a 3-3/4” wire to each of the VIN, GND, and D2 pins of the Particle Photon.
- Solder the 10M-Ohm resistor to pins D3 and D4 of the Photon.
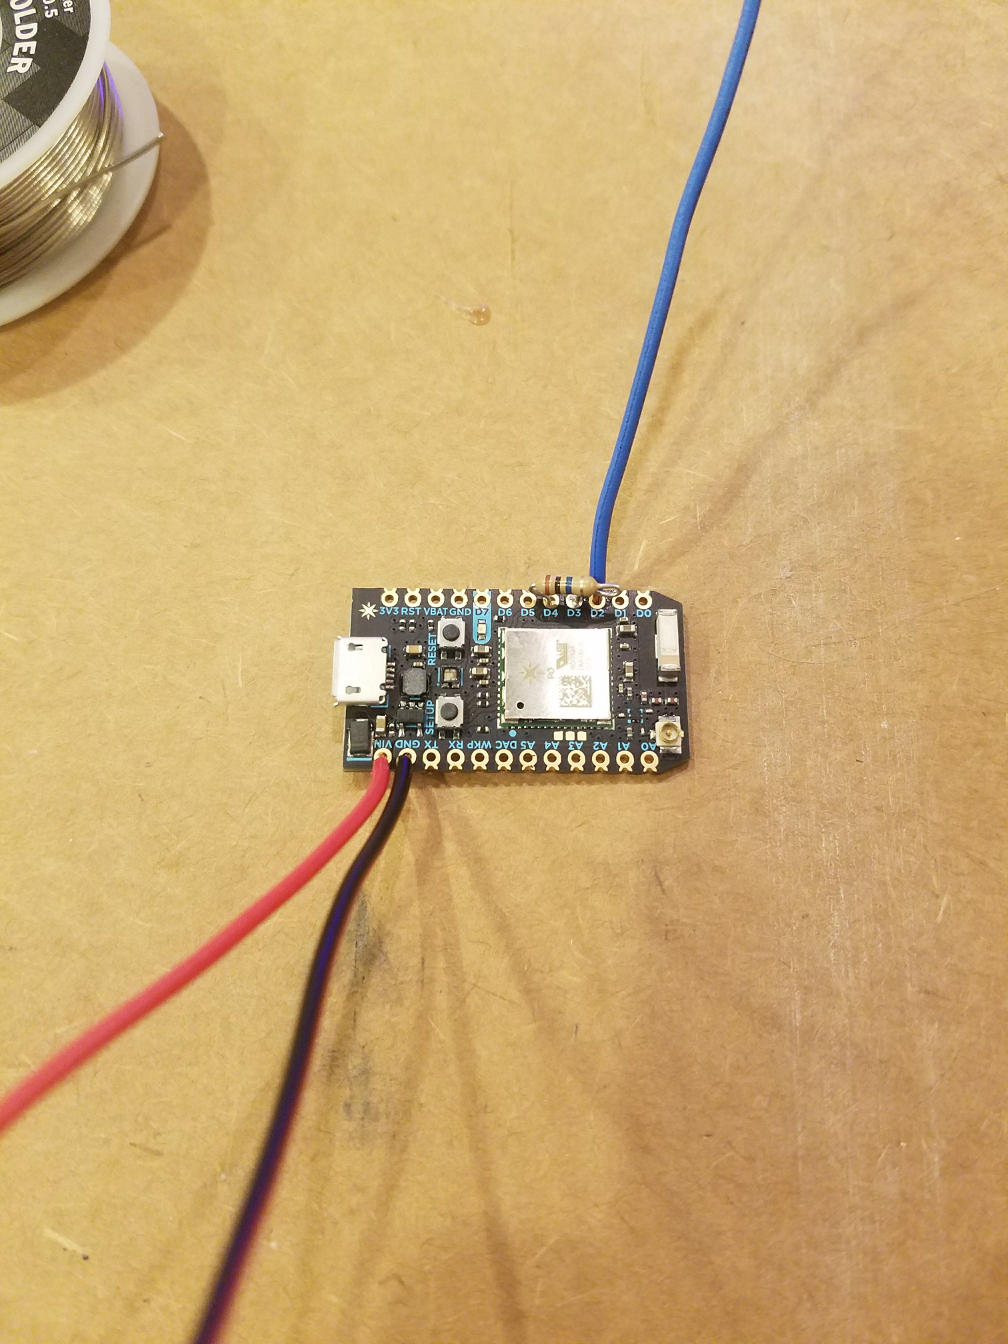
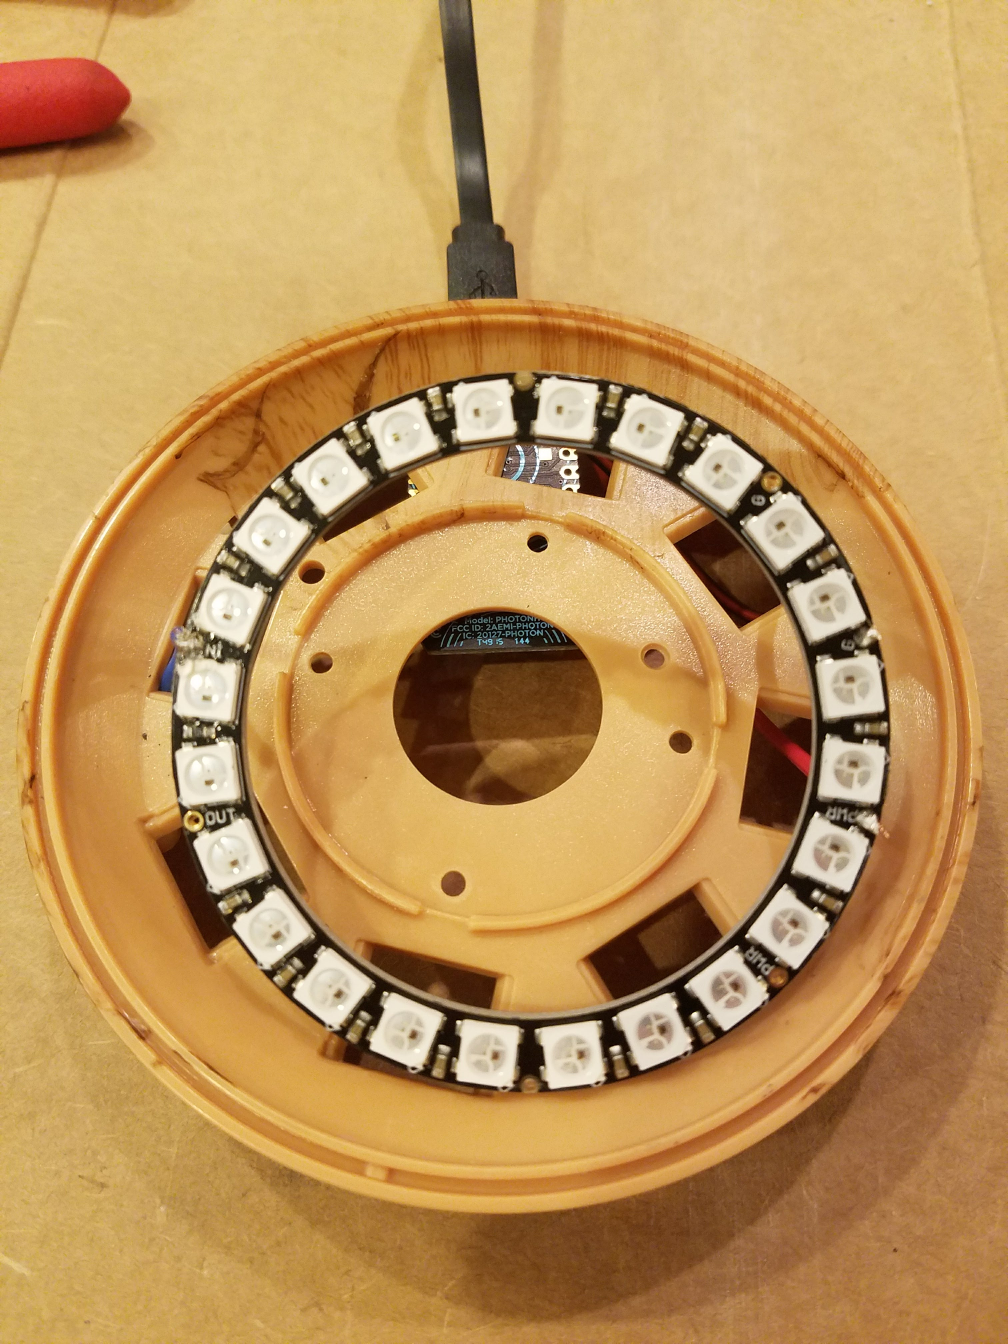
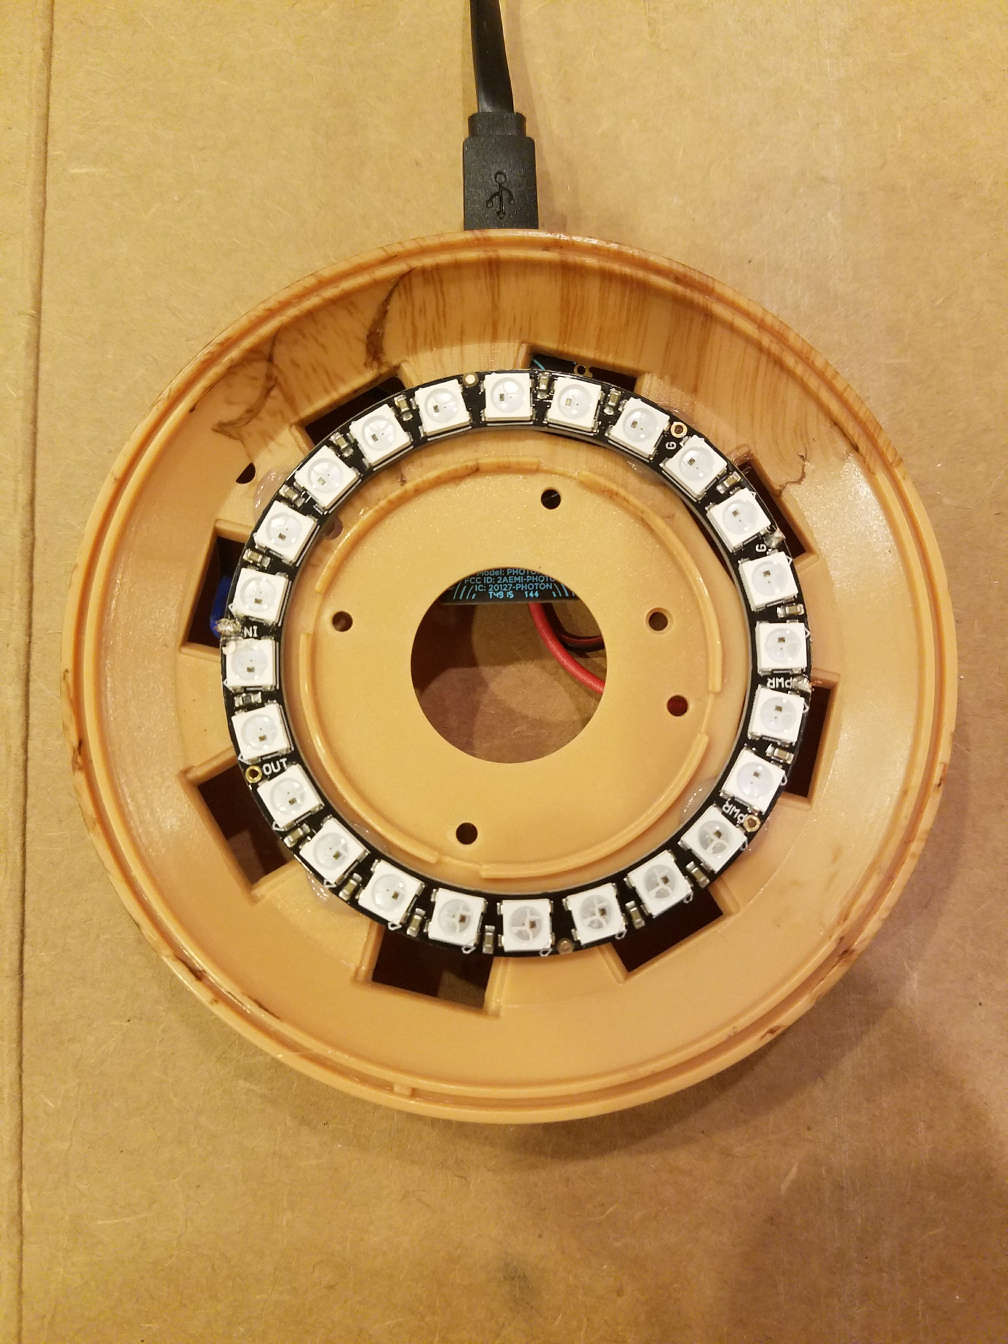
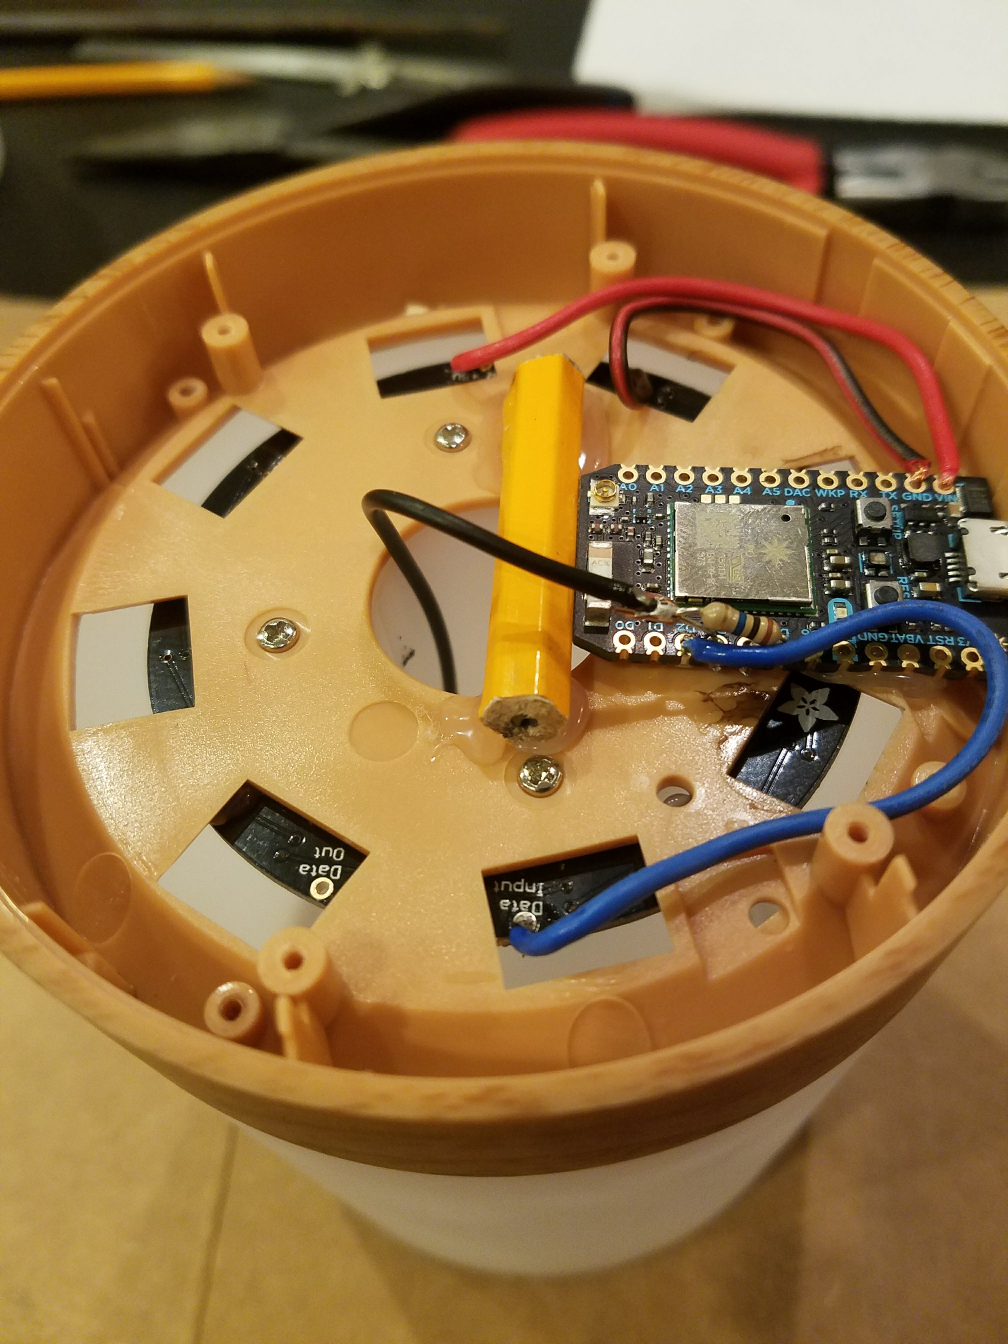
- Thread the wires through the holes in the base and solder them to the NeoPixel. VIN should connect to “PWR +5V”, GND should connect to “GND”, and D2 should connect to “Data Input”. There may be multiple power and ground pins, choose the ones that are closest to the wires. It is helpful to plug a USB cable (unpowered) into the photon through the USB hole in the lamp base to help hold the Photon in place.
Step 4: Test the Lamp’s Functionality
At this point we are ready to test the Lamp’s functionality to ensure we soldered everything correctly and all the components are working.
If you have not yet set up your Photon, plug it in and use the app provided by Particle to connect to your Photon and get it connected to the internet via wifi. Particle provides good instructions for getting your Photon connected.
Once you have your photon connected, you should set up your development environment for getting code onto the Photon, I prefer using their command line tool, but their web IDE is pretty nice as well if you want to get started quickly.
If you are using the command line tool, then you can clone the repository containing the code from Github in order to flash it onto the Photon, otherwise you will need to copy and paste the code into the web browser in order to use it. I will assume you are doing the former.
-
Once you have connected your Photon to the internet, installed the command line tool, and logged in, you can clone the touch_light repo by running:
$ git clone git@github.com:pblesi/touch_light.git - In
src/touch_light.inoupdateNUM_PARTICLESwith the number of touch lamps you intend to have linked together. - Update
particleId[]with the 24 character unique identifier for your Photon. This can be found by runningparticle liston the command line. - Update
particleColors[]with your prefered default color for this lamp. Some trial and error may be required to identify which color corresponds to which number. Each color is a value between 0 and 255 that maps onto the RGB Color wheel. 0 and 255 correspond to green. -
Compile your code into a firmware
.binfile.$ particle compile photon -
Flash your photon
$ particle flash <the name of your touch lamp> <the generated firmware.bin file> - You should see a white flash, a cycle through the color wheel, and then a fade out on green. If you do not see this behavior, check for a short in the circuits. You should not touch the lamp between when the light flashes and when it traverses the color wheel as it is calibrating its touch sensor.
Step 5: Secure the Components
Once you have verified the lamp lights up as expected, you can secure the electrical components to the lamp fixture.
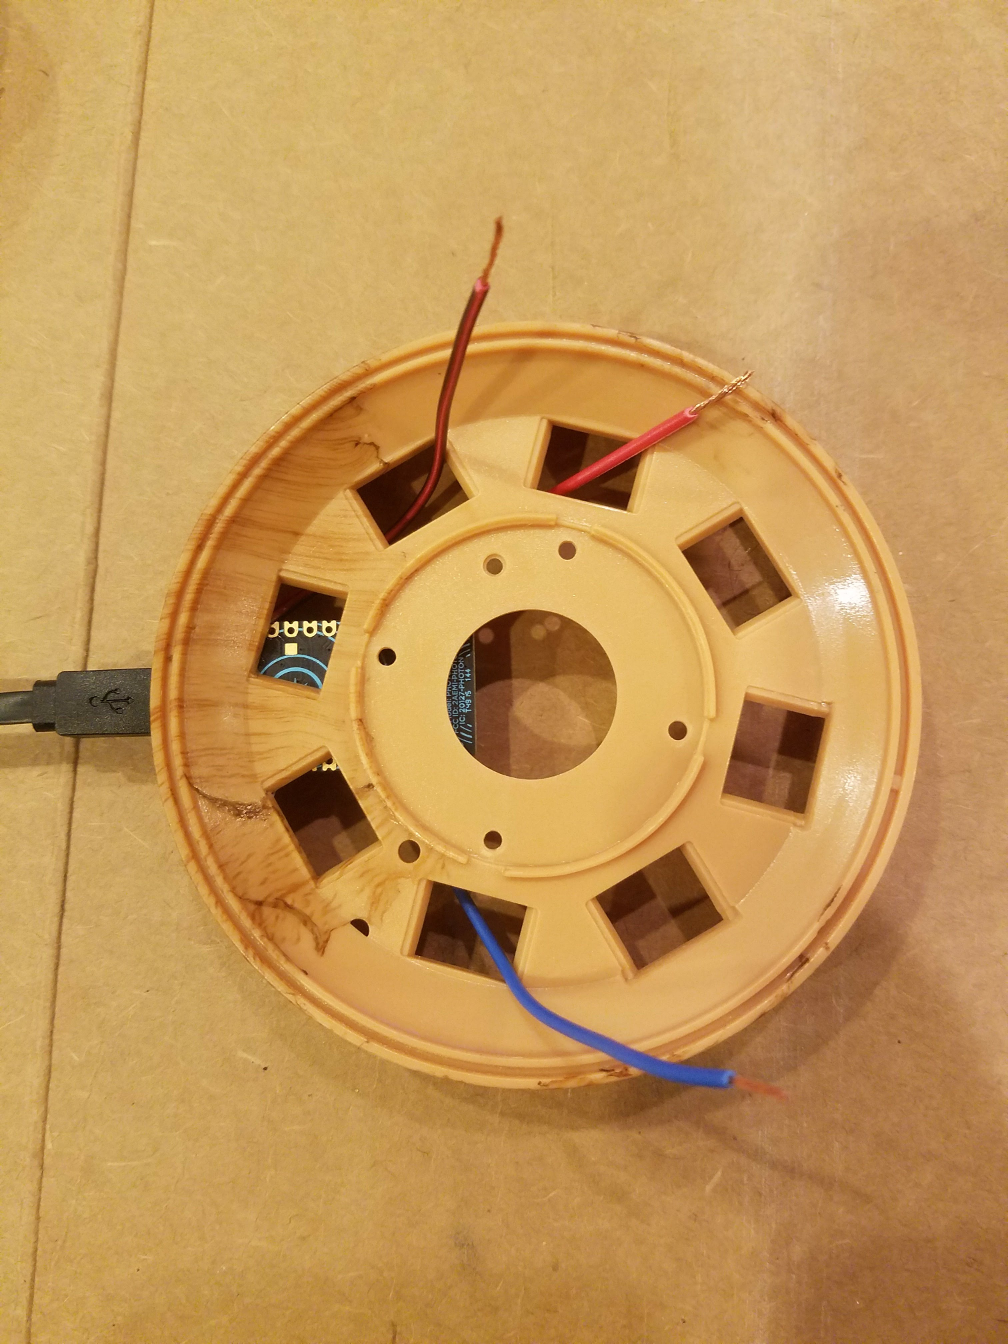
- Apply four dollops of hot glue to the lamp base in order to secure the NeoPixel. Do this quickly to prevent having the glue prematurely dry without securing the NeoPixel.
- Secure the wooden dowel to the lamp base (I used a pencil) behind the Photon board. This is used to prevent the Photon from moving when a USB cable is plugged into it. When gluing the wooden dowel, be careful to not cover the three holes that are used to secure the white dome to the lamp base (the fourth hole will be covered by the Photon).
- Unplug the USB cable from the Photon and check if it comes loose. If the Photon comes loose, secure it by gluing it to the base. If you cannot remove the Photon, put glue around the edges to make sure it stays in place. As soon as the Photon is put in place, make sure the Photon is aligned with the USB hole and plug the USB cable into the Photon to ensure it fits easily when the Photon is secured.
Step 6: Reassemble the Lamp
You’re almost finished! All that’s left is to connect the touch plate to the Photon and reassemble the lamp.
- Screw the white dome back into the lamp base.
- Reattach the touch plate to the white dome, threading the attached wire through the hole drilled in the battery compartment.
- Solder the wire from the touch plate to the D3 side of the resistor.
- Screw the bottom plate back on to the base.
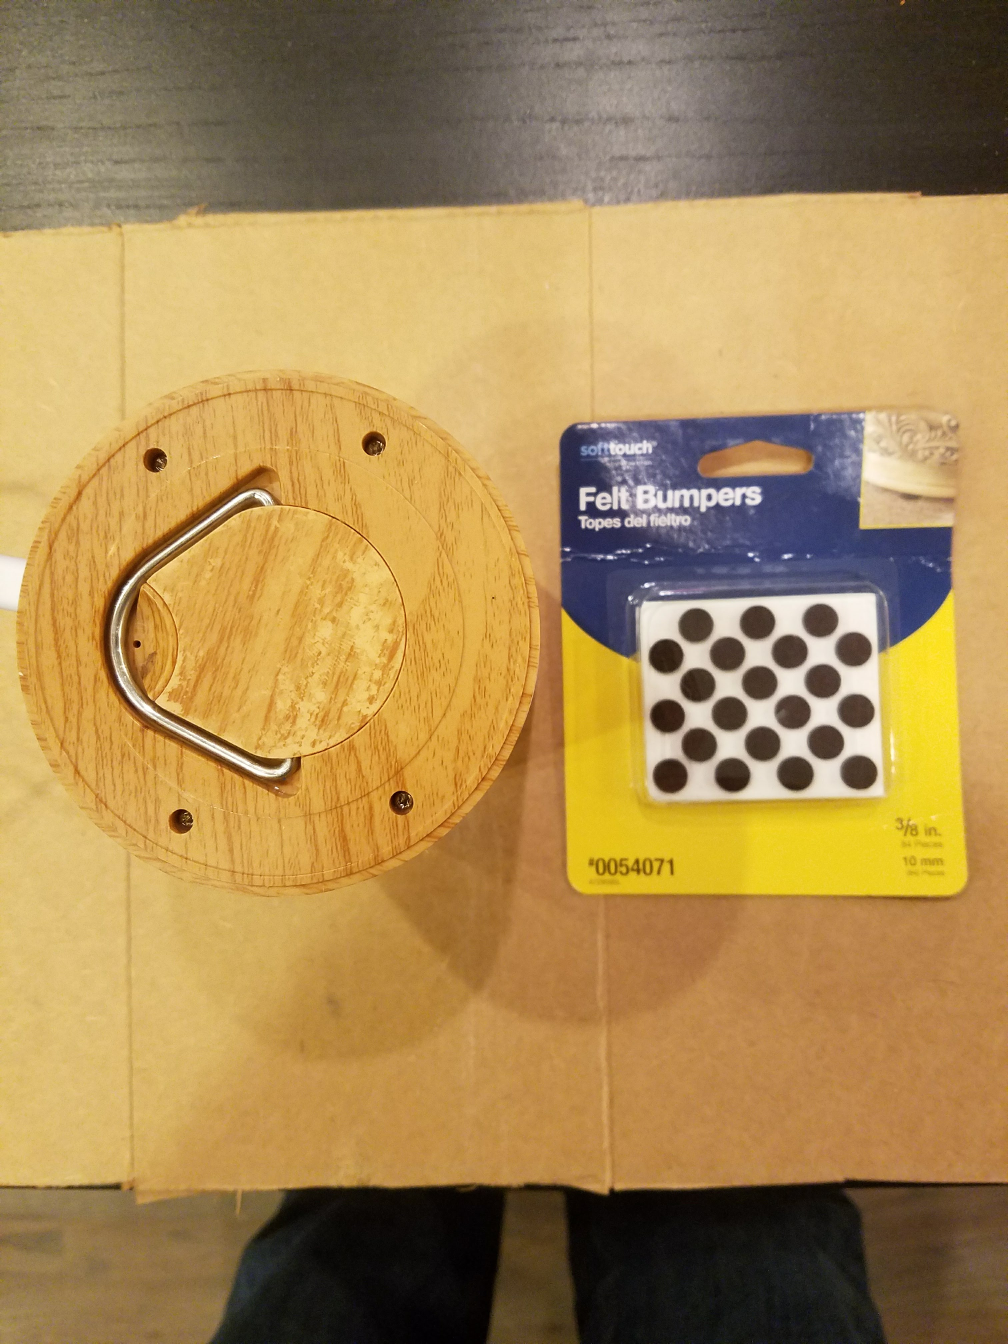
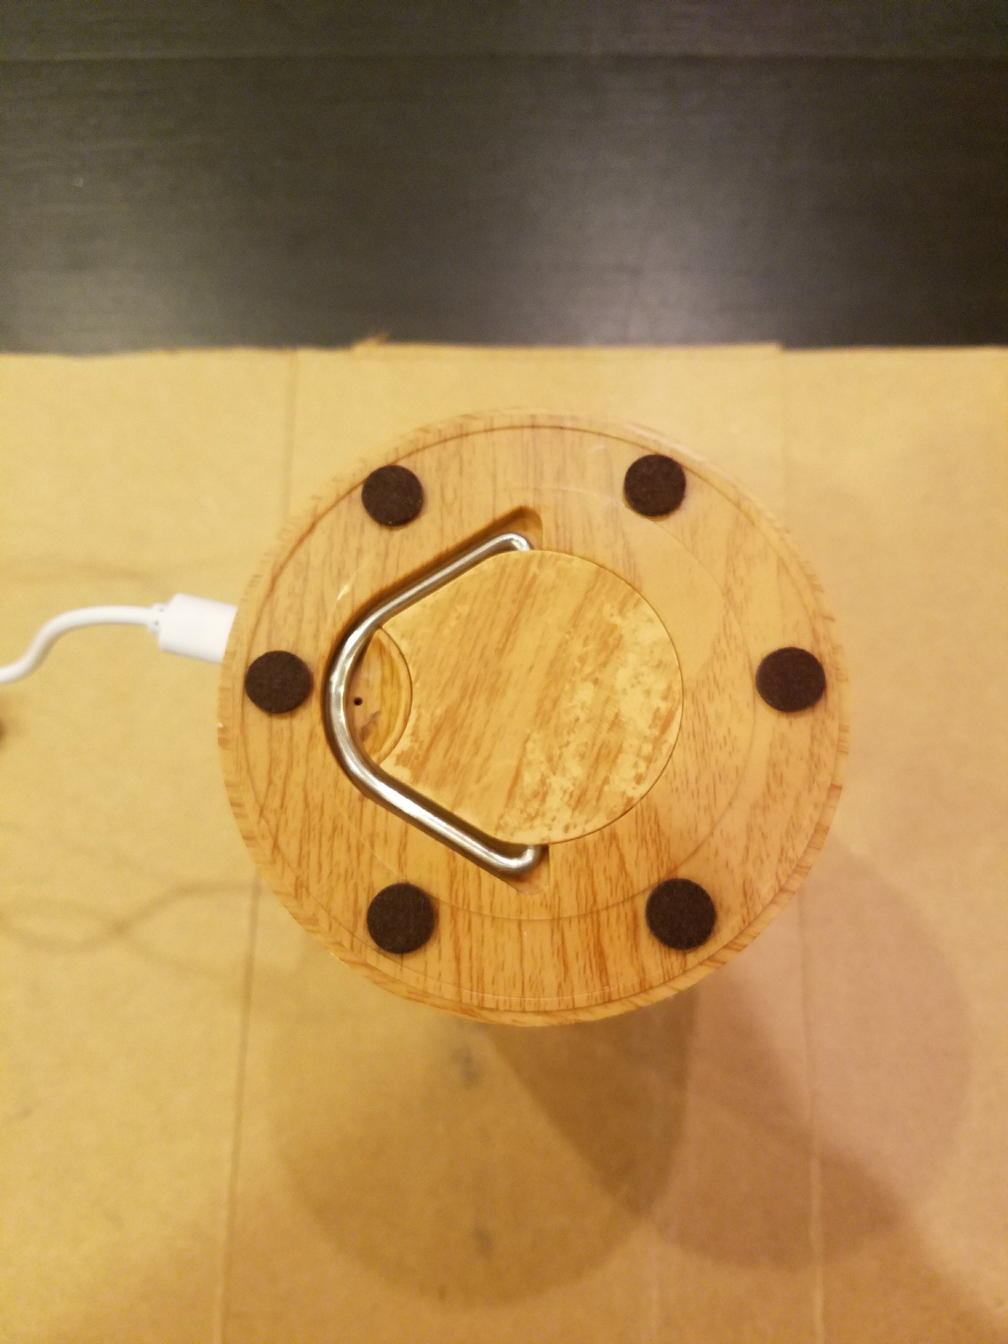
- Place six felt pads along the bottom ring of the lamp, covering the exposed screw holes.
- You’re done! You can now play with your wifi touch lamp!
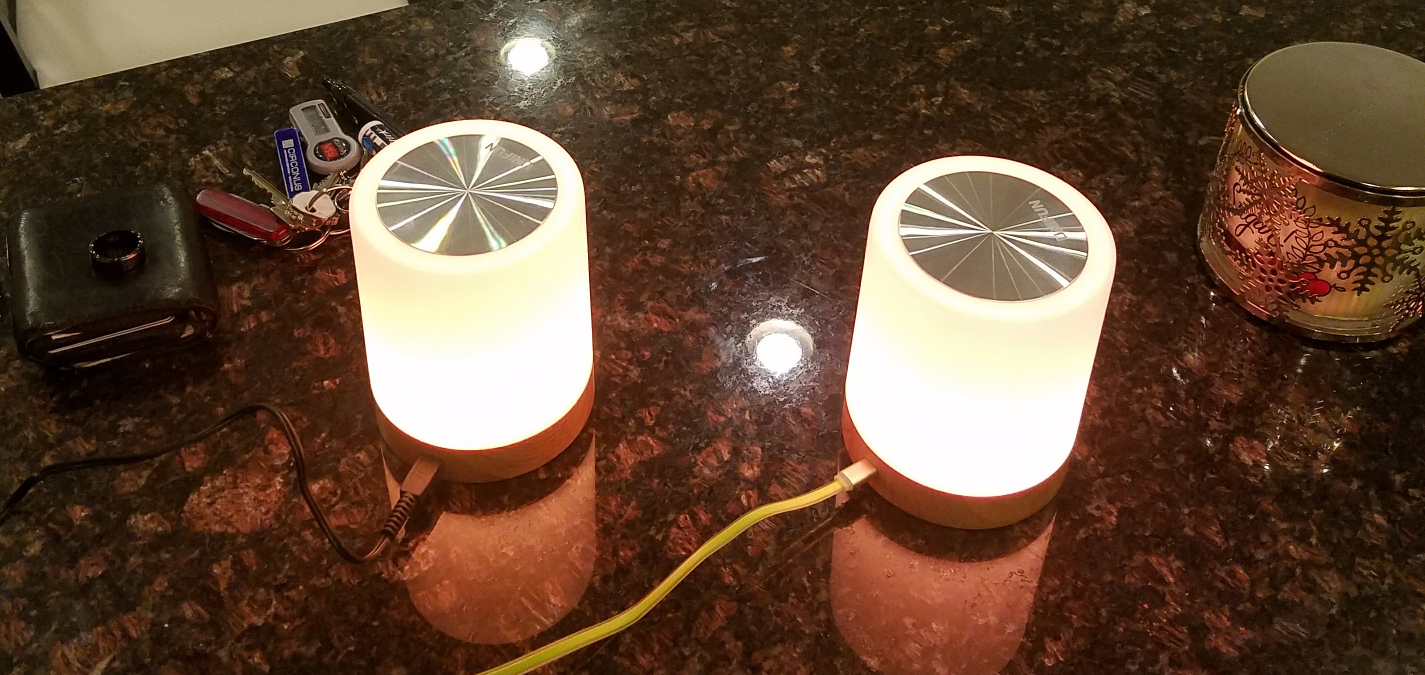
Final Product
I built four lamps to give to my wife, her mother, grandma, and aunt. They work beautifully and were a joy to build. As a first Photon project, they were easy to get started and assemble. Check out the video below for a demonstration of how they work.